
2012 Final Clearout....Fabrics!!
I am in the process of cleaning out my studio for good. Time to find new homes for my wonderful fabric collection.
$3.00 or less per yard/meter!
Including designer fabrics
I am in the process of cleaning out my studio for good. Time to find new homes for my wonderful fabric collection.
$3.00 or less per yard/meter!
Including designer fabrics
All lots are described the best I can and sizes are given. Dimensions are given in inches, but for easy reference...
44" x 36" equals 1 yard.
Home decor fabrics (where noted) are heavier weight and wider widths.
Great for home decor projects or for your handbag patterns!
All sales final.
Scrap fabric bundles (where noted) also available.
Ordering information:
Please email your order request (including Lot # and your Paypal address) to
designsbymarnieperry@shaw.ca
I will be updating this sale frequently, but in the event that your selection is already sold, I will contact you asap. Be sure to include your Paypal address so I can send you an invoice.
Payment information:
Paypal or cash with pickup only. To prevent your order from being voided, please complete the Paypal transaction within 12 hours of receiving your invoice. Don't have Paypal, its easy to sign up! Instant payment only (instant transfer or secured with credit card).
Paypal fees will be charged to you, the buyer at a rate of 3% of the total plus $0.30 per transacation (this is Paypal's fixed rate fee).
Shipping:
I will gladly give shipping quotes. Please remember that I live in Canada. This means that shipments are based on weight and size and anything crossing over the border will take approximately 2 weeks from date of shipment. I will find the most economic way to ship your package. I will not charge for packing supplies :)
Feel free to ask questions

^^Lot 1. **SOLD**
Primitive Stars $8.50
Primitive Stars $8.50
Green stars in circles 74x44"
Brown stars in squares 44x13"
Beige stars in circles 44x9" plus
Speckled mustard 22x12" plus

^^Lot 2. **SOLD**
Primitive Angel $8.75
Primitive Angel $8.75
Leaves on beige 44x20"
Brown stripe 44x28"
Brown Angel 36x18"
Rust plaid 44x20"
Green plaid 44x20"

^^Lot 3. Pinks $11.00
Pink Linen 44x88" (2 yards)
Baby carriage 33x13"
Pink and beige damask 22x35" (1/2 yard)
Tone on tone hearts 25x44" (3/4 yard)
Thick stripes 17x32 plus 2 large scraps

^^Lot 4. **SOLD**
Cupcakes $6.25
Cupcakes $6.25
Green and pink squares (heavy cotton) 44x20"
Blue and green large flower 30x10" plus
Green with blue polka dots 44x22"
Green cupcakes 44x25"
blue/grey broadcloth 40x10" plus

^^Lot 5. **SOLD**
Amy Butler Blue $10.50
Amy Butler Blue $10.50
Amy Butler blue flower 36x44" (1 yard)
Amy Butler blue dots 36x44" (1 yard)
Blue script 54x17"
Blue and tan stripes 44x25"
Blue large flower 36x33"

^^Lot 6. **SOLD**
Apples and Pears $8.75
Apples and Pears $8.75
Orange and white large polka dots 37x44" (1 yard)
Blue with red polka dots 20x44"
Blue apples and pears 20x44" (1/2 yard)
Red butterflies (heavy cotton) 26x44"

^^Lot 7. **SOLD**
Ice Cream $6.00
Ice Cream $6.00
Pink linen 14x22"
Small pink dots (large scrap)
Blue ice cream cones 26x44"
Chocolate brown with large pink dots 29x19"
Green hearts and flower buds (large scrap)
Pink hearts and and flower buds 27x36" plus

^^Lot 8. **SOLD**
Dandelions $7.50
Dandelions $7.50
Light beige with large green flower print (home decor fabric) 58x36" plus
Brown with large cream dandelions 58x30"

^^Lot 9. Flower Pots $11.00
Carol Enders faded black check 102x44" (almost 3 yards)
Mini purple check 44x20"
Henry Glass blue whimsical flower pots 44x20"
Purple check 44x20"
Purple Plaid 44x20"

^^Lot 10. Glamour Girl $17.00
7.5 yards of fabric!!!!
White with large black dots (heavy cotton) 27x24.5"
and second piece 56x35"
Black with blue accessories 44x40" plus 23x28" attached
Black and white floral (home decor fabric) 24x50" and 33x13" attached
Glamour Girl retro black and white 44x22" and 16x20" attached
Black broadcloth 88x44"

^^Lot 11. Green Dandelions $11.00
Chocolate brown flowers 26x26"
Beige with off white large leaf print 46x21"
Greena and brown stripe (home decor fabric) 29x18"
Green and teal butterfly (home decor fabric) 30x25"
Green large dandelion (home decor fabric) 25x26 plus
Muslin 54x56"
(note: there is a red mark near the edge of the muslin.
This can be easily cut off and will not effect the dimensions given)
_____________________________________________________________________________
HOME DECOR FABRICS- These have a heavier weight and larger widths.
Great for home and handbag projects
Sold in total yardage. Cuts will not be made. All sales final

^^Lot 12. Cream and green soft damask - 2 yards $5.00

^^Lot 13. **SOLD**
Liz Claiborne orange carnation Large print - 2 yards $5.00
Liz Claiborne orange carnation Large print - 2 yards $5.00

^^Lot 14. Chocolate brown flowers - 2 yards $4.00

^^Lot 15. Soft green and pink pineapple/floral - 3 yards $6.00

^^Lot 16. Brown damask - 2 yards $5.00

^^Lot 17. Pink and beige damask - 3 yards $6.00

^^Lot 18. Green paisley - 1 yard $3.00

^^Lot 19. **SOLD**
Beige large floral - 1 yard $3.00
Beige large floral - 1 yard $3.00
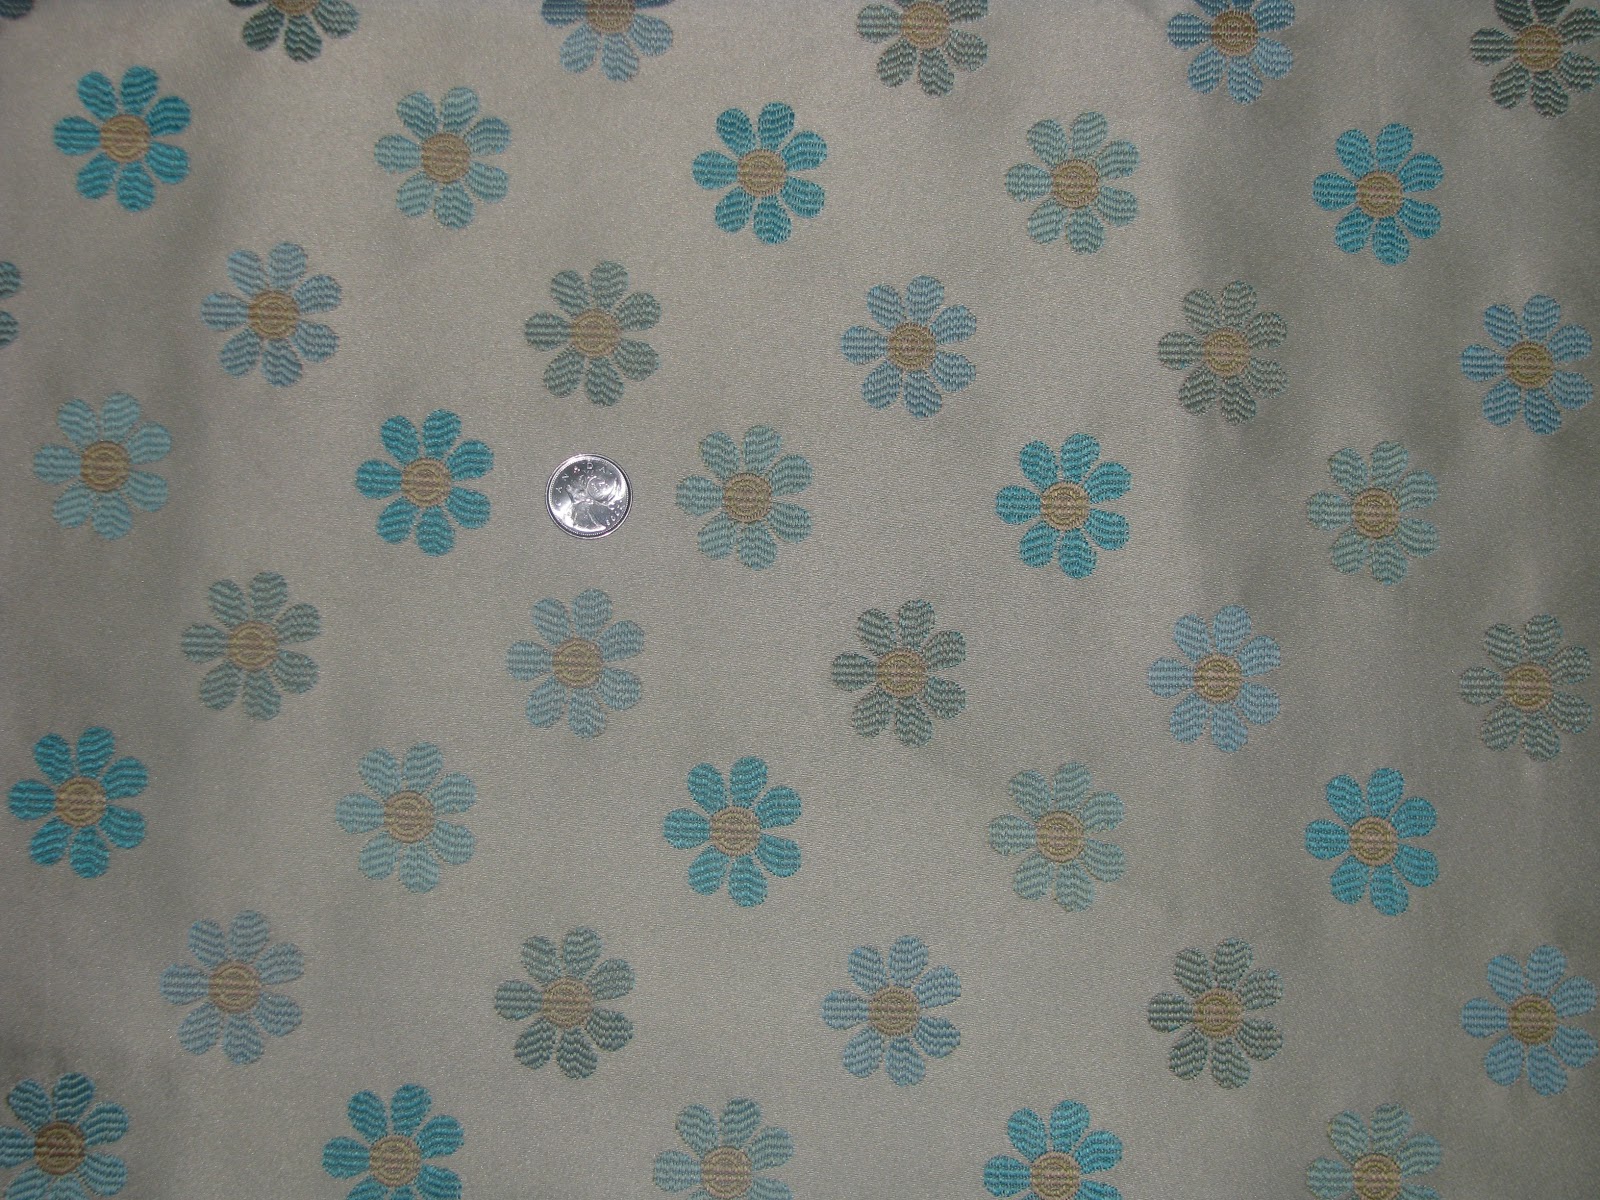
^^Lot 20. **SOLD**
blue floral (this fabric has a shine to it and the flowers are embroidered) - 1 yard $3.00
___________________________________________________________________________
SCRAP BUNDLES
Great for scrap projects like fabric flowers, patchwork projects, button covers,
scrap booking, gift wrapping, hair clips, appliques, etc
I do not know the dimensions of each individual piece. They
range from 8x8" squares to full quarters and more. Most are very generous.
All sales final
 ^^Lot 20- Plaid Scraps $2.00
 ^^Lot 21 - **SOLD** Mustard Scraps $2.00
 ^^ Lot 22 - Christmas Scraps (there are a couple stars 'n stripes in there too) $2.00
 ^^Lot 23 - Home Decor Green scraps $2.00
 ^^Lot 24 - Black and White scraps $1.50
 ^^Lot 25 - Pink and Orange scraps - $2.00
 ^^Lot 26 - **SOLD** Primitive Brown scraps $2.00
 ^^Lot 27 - Primitive Red scraps $2.00
 ^^Lot 28 - **SOLD** Primitive Asst scraps $2.00
 ^^Lot 29 - Primitive Green scraps $2.00

blue floral (this fabric has a shine to it and the flowers are embroidered) - 1 yard $3.00
___________________________________________________________________________
SCRAP BUNDLES
Great for scrap projects like fabric flowers, patchwork projects, button covers,
scrap booking, gift wrapping, hair clips, appliques, etc
I do not know the dimensions of each individual piece. They
range from 8x8" squares to full quarters and more. Most are very generous.
All sales final


^^Lot 30 - **SOLD** Funky scraps $1.50
(these were cut for a pattern.
Three fabrics in 3 sizes...8-14x6", 4-10x4", 8-6x3"


